How To Use Stereo Microscope ?
To use a stereo microscope, first, place the specimen you want to observe on the stage or platform. Adjust the focus knobs to bring the specimen into focus. Use the zoom or magnification controls to increase or decrease the level of magnification as desired. You can also adjust the interpupillary distance to align the eyepieces with your eyes. Use the diopter adjustment to compensate for any differences in vision between your eyes. Finally, use the illumination controls to adjust the lighting on the specimen for optimal visibility.
1、 Adjusting the magnification and focus settings
To use a stereo microscope effectively, it is important to understand how to adjust the magnification and focus settings. These adjustments will allow you to achieve a clear and detailed view of your specimen.
Firstly, locate the magnification knob on the microscope. This knob typically has a range of magnification options, such as 10x, 20x, and 40x. Start with the lowest magnification setting and gradually increase it until you achieve the desired level of detail. It is important to note that higher magnification may result in a narrower field of view and reduced depth of field.
Next, focus on the specimen by adjusting the focus knobs. Most stereo microscopes have two focus knobs, one for coarse adjustment and another for fine adjustment. Begin with the coarse adjustment knob to bring the specimen into rough focus. Once the specimen is roughly focused, use the fine adjustment knob to achieve a sharp and clear image. It is crucial to make small, incremental adjustments to avoid overshooting the focus point.
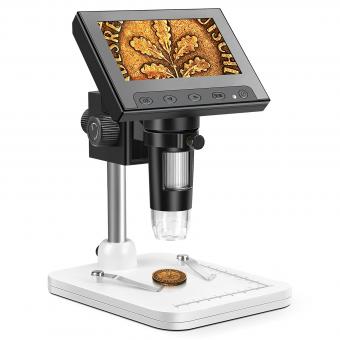
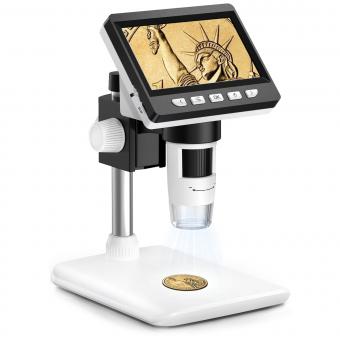
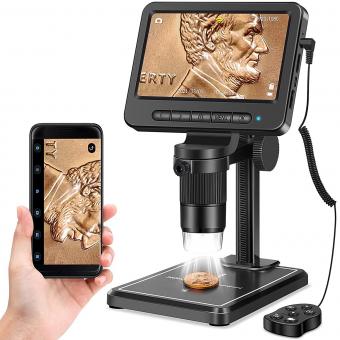
In recent years, some stereo microscopes have incorporated digital features, such as built-in cameras or connectivity options. These advancements allow for real-time imaging and the ability to capture and share images or videos of the specimen. If your microscope has these capabilities, familiarize yourself with the user manual to understand how to utilize these features effectively.
Remember, practice and patience are key when using a stereo microscope. It may take some time to become comfortable with adjusting the magnification and focus settings, but with practice, you will be able to obtain clear and detailed images of your specimens.

2、 Properly positioning the specimen on the stage
To properly use a stereo microscope, one of the crucial steps is to correctly position the specimen on the stage. This ensures optimal viewing and accurate analysis of the sample. Here is a step-by-step guide on how to do it effectively:
1. Prepare the specimen: Ensure that the specimen is clean and free from any debris or contaminants. If necessary, use a brush or compressed air to remove any loose particles.
2. Adjust the lighting: Proper lighting is essential for clear visualization. Adjust the illumination source to provide adequate light on the specimen. Avoid excessive glare or shadows that may hinder observation.
3. Place the specimen on the stage: Gently place the specimen on the stage of the stereo microscope. Ensure that it is centered and positioned in a way that allows easy access for manipulation and observation.
4. Secure the specimen: If the specimen is small or prone to movement, use stage clips or adhesive tape to secure it in place. This prevents any unintended shifts or vibrations during examination.
5. Adjust the focus: Use the coarse and fine focus knobs to bring the specimen into focus. Start with the coarse adjustment to roughly focus on the sample, and then use the fine adjustment for precise focusing.
6. Observe from different angles: The advantage of a stereo microscope is its ability to provide a three-dimensional view. Take advantage of this by observing the specimen from different angles and adjusting the zoom and focus accordingly.
7. Document and analyze: If necessary, capture images or videos of the specimen for further analysis or documentation. This can be done using a camera attachment or software connected to the microscope.
It is important to note that the latest advancements in stereo microscope technology, such as digital imaging and advanced lighting options, can enhance the accuracy and efficiency of specimen positioning. These advancements allow for better visualization and analysis, making it easier to identify and study intricate details of the specimen.

3、 Utilizing the binocular eyepieces for a 3D view
To use a stereo microscope effectively, it is important to understand its features and how to utilize them. One of the key features of a stereo microscope is the binocular eyepieces, which provide a 3D view of the specimen being observed.
To begin, adjust the interpupillary distance of the eyepieces to match the distance between your eyes. This ensures a comfortable viewing experience and allows for proper alignment of the microscope's optics. Next, adjust the focus knobs to bring the specimen into clear view. The stereo microscope typically has two separate focus knobs, one for each eyepiece, allowing for precise focusing.
Once the specimen is in focus, utilize the binocular eyepieces to achieve a 3D view. This is achieved by looking through both eyepieces simultaneously, allowing your brain to merge the two slightly different images into a single 3D image. This provides depth perception and enhances the observation experience.
In addition to utilizing the binocular eyepieces, it is important to consider the latest advancements in stereo microscope technology. For example, some modern stereo microscopes offer digital imaging capabilities, allowing you to capture images or record videos of the observed specimen. This can be useful for documentation, analysis, or sharing with others.
Furthermore, some stereo microscopes now come with integrated LED lighting systems, providing uniform and adjustable illumination for the specimen. This ensures optimal visibility and clarity during observation.
In conclusion, to use a stereo microscope effectively, adjust the interpupillary distance, focus the specimen, and utilize the binocular eyepieces for a 3D view. Stay updated with the latest advancements in stereo microscope technology to take advantage of features such as digital imaging and LED lighting.

4、 Controlling the illumination for optimal visibility
To use a stereo microscope effectively, it is crucial to control the illumination for optimal visibility. The illumination plays a vital role in enhancing the clarity and contrast of the specimen being observed. Here is a step-by-step guide on how to control the illumination for the best results:
1. Adjust the intensity: Most stereo microscopes have adjustable illumination settings. Begin by setting the intensity to a moderate level and gradually increase or decrease it as needed. This will prevent overexposure or underexposure of the specimen.
2. Choose the right angle: The angle of illumination can greatly impact the visibility of the specimen. Adjust the angle of the light source to minimize glare and shadows. Experiment with different angles to find the one that provides the best illumination without obstructing the view.
3. Use diffusers or filters: Diffusers or filters can be used to soften or modify the light. They can help reduce glare and enhance contrast. Some stereo microscopes come with built-in diffusers or filters, while others may require external attachments.
4. Consider polarized light: Polarized light can be used to reduce reflections and improve visibility, especially when observing reflective or shiny specimens. Polarizing filters can be added to the light source or the microscope itself to achieve this effect.
5. Use darkfield or brightfield illumination: Darkfield and brightfield illumination techniques can be employed to highlight specific features of the specimen. Darkfield illumination is useful for observing transparent or translucent specimens, while brightfield illumination is suitable for opaque specimens.
6. Regularly clean the microscope: Dust or debris on the microscope's lenses or light source can obstruct the illumination and affect visibility. Clean the lenses and light source regularly using appropriate cleaning materials to maintain optimal illumination.
It is important to note that advancements in technology have led to the development of LED illumination systems, which offer improved energy efficiency, color accuracy, and adjustable intensity. These systems can provide better illumination control and enhance the overall viewing experience.
