How To Use Voice Activated Recorder ?
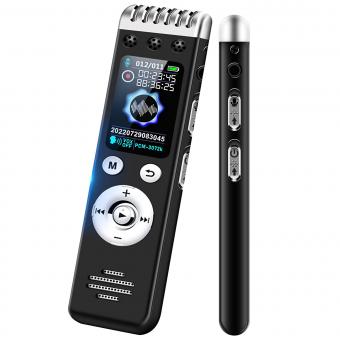
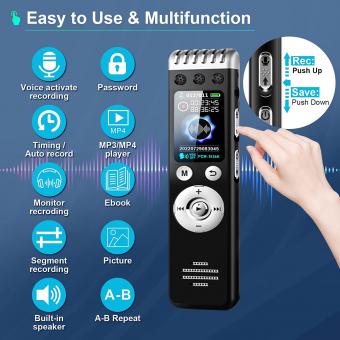
To use a voice-activated recorder, first ensure that the device is charged or has fresh batteries. Then, familiarize yourself with the recorder's controls and settings. Typically, you will find buttons for power, recording, playback, and menu navigation.
To start using the voice-activated recording feature, turn on the device and access the settings menu. Look for an option related to voice activation or voice-activated recording. Enable this feature and adjust the sensitivity level if necessary.
Once the voice-activated recording is set up, simply press the record button to begin capturing audio. The recorder will automatically start and stop recording based on the presence or absence of sound. This feature helps conserve storage space and makes it easier to locate important sections of the recording.
Remember to test the voice-activated recording function in different environments to ensure optimal performance. Additionally, familiarize yourself with the device's storage capacity and transfer methods to save and access your recordings effectively.
1、 Choosing the right voice-activated recorder for your needs
Choosing the right voice-activated recorder for your needs is essential to ensure that you capture high-quality audio recordings effortlessly. With advancements in technology, voice-activated recorders have become more sophisticated and user-friendly. Here's a guide on how to use a voice-activated recorder effectively.
1. Research and select the right recorder: Consider factors such as recording quality, storage capacity, battery life, and ease of use. Look for a recorder that suits your specific requirements.
2. Familiarize yourself with the device: Read the user manual thoroughly to understand the features and functions of the recorder. This will help you make the most of its capabilities.
3. Charge the device: Ensure that the recorder is fully charged before use. This will prevent any interruptions during recording sessions.
4. Adjust settings: Set the recording quality and format according to your preferences. Some recorders offer options for different audio formats, such as WAV or MP3, allowing you to balance file size and audio quality.
5. Test the voice activation feature: Voice-activated recorders automatically start recording when they detect sound above a certain threshold. Adjust the sensitivity level to avoid missing important audio or recording unnecessary background noise.
6. Position the recorder correctly: Place the recorder in a suitable location to capture clear audio. Avoid covering the microphone or placing it too far from the sound source.
7. Review and transfer recordings: After recording, listen to the audio to ensure it meets your expectations. Use the recorder's built-in speaker or connect headphones for better sound quality. Transfer the recordings to your computer or other devices for storage or further processing.
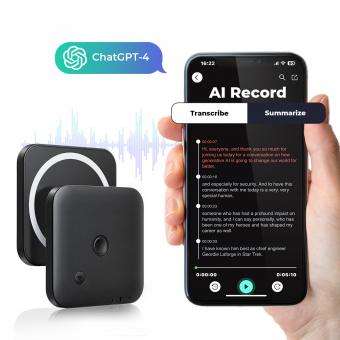
It's worth noting that voice-activated recorders have evolved significantly, with some models now offering additional features like cloud storage, smartphone integration, and transcription services. Stay updated with the latest advancements in voice-activated recording technology to make the most informed choice for your needs.
2、 Setting up and configuring your voice-activated recorder
Setting up and configuring your voice-activated recorder is a relatively simple process that can greatly enhance your ability to capture audio recordings effortlessly. Here's a step-by-step guide on how to use a voice-activated recorder effectively.
1. Choose the right recorder: There are various voice-activated recorders available in the market, ranging from standalone devices to smartphone apps. Select one that suits your needs and budget.
2. Familiarize yourself with the recorder: Read the user manual or explore the app's features to understand how the voice-activated recording function works. This will help you make the most of its capabilities.
3. Adjust the sensitivity level: Most voice-activated recorders allow you to adjust the sensitivity level to activate recording based on sound intensity. Set it according to your preference, ensuring it's not too sensitive to pick up background noise or too insensitive to miss important conversations.
4. Test the recorder: Before using it in important situations, conduct a trial run to ensure the recorder is functioning properly. Record a short conversation and play it back to check the audio quality and sensitivity settings.
5. Position the recorder strategically: Place the recorder in a location where it can capture clear audio without being too conspicuous. Experiment with different positions to find the optimal placement.
6. Review and edit recordings: After recording, review the audio files to ensure they are clear and audible. Trim any unnecessary parts and save the important segments for future reference.
7. Protect your recordings: If your recorder has password protection or encryption features, enable them to safeguard your recordings from unauthorized access.
It's worth noting that voice-activated recorders have become increasingly advanced, with some models offering cloud storage and transcription services. Stay updated with the latest features and advancements to make the most of your voice-activated recorder.
3、 Understanding the recording quality and file formats
Understanding the recording quality and file formats is essential when using a voice-activated recorder. These devices have become increasingly popular due to their convenience and versatility. To make the most of your voice-activated recorder, it is important to understand how to use it effectively.
Firstly, familiarize yourself with the recording quality options available on your device. Most voice-activated recorders offer different quality settings, such as low, medium, and high. The higher the quality, the clearer and more detailed the recording will be, but it will also result in larger file sizes. Consider the purpose of your recordings and the available storage space when selecting the appropriate quality setting.
Additionally, understanding the different file formats supported by your voice-activated recorder is crucial. Common file formats include WAV, MP3, and WMA. Each format has its advantages and disadvantages. WAV files offer uncompressed audio and high quality but consume more storage space. MP3 and WMA files are compressed, resulting in smaller file sizes but slightly lower audio quality. Choose a file format that suits your needs, taking into account factors such as storage capacity and compatibility with other devices.
It is worth noting that advancements in technology have led to voice-activated recorders offering improved recording quality and more versatile file formats. Some devices now support lossless audio formats like FLAC, which provide high-quality recordings while maintaining smaller file sizes. These advancements ensure that users can capture clear and detailed audio without sacrificing storage space.
In conclusion, understanding the recording quality options and file formats of your voice-activated recorder is crucial for optimal usage. Consider the purpose of your recordings, available storage space, and advancements in technology to make informed decisions. By doing so, you can ensure that your voice-activated recorder meets your recording needs effectively.

4、 Using voice commands to start and stop recordings
Using voice commands to start and stop recordings is a convenient and efficient way to use a voice-activated recorder. With advancements in technology, many voice recorders now come equipped with this feature, allowing users to easily control their recordings hands-free.
To use a voice-activated recorder, first, ensure that the device is properly set up and ready to use. This may involve charging the recorder, inserting batteries, or connecting it to a computer or smartphone. Once the device is ready, familiarize yourself with the specific voice commands it recognizes.
To start a recording, simply speak the designated voice command, such as "Start recording" or "Begin recording." The recorder will then initiate the recording process, capturing audio from its built-in microphone or an external microphone if connected.
To stop a recording, use the appropriate voice command, such as "Stop recording" or "End recording." The recorder will then cease recording and save the audio file.
It is important to note that different voice-activated recorders may have varying voice command options. Some devices may offer additional commands, such as "Pause recording" or "Resume recording," allowing users to temporarily halt and resume recordings without stopping and starting a new file.
The latest voice-activated recorders often come with advanced features, such as noise cancellation technology, which helps improve the quality of recorded audio by reducing background noise. Additionally, some recorders may offer cloud storage options, allowing users to automatically upload their recordings to a secure online platform for easy access and backup.
Overall, using voice commands to start and stop recordings on a voice-activated recorder is a user-friendly and efficient method. It eliminates the need for manual operation, allowing users to focus on the content being recorded rather than the technical aspects of the device.
